# Storage Proxy
Rather than managing access rights per asset (each asset signed with a time expiring access token), assets are now scoped per repository and accessed using scoped access cookie. To implement this approach, we introduced AWS Cloudfront (since AWS S3 does not support access cookie functionality) and a local storage proxy that can cover the same functionality when Cloudfront is not an option.
This approach has some benefits and some less relevant flaws:
- Once the user opens up a repository and an access cookie is obtained, it enables the user to access all repository assets.
- No need for assets map within the content element (to instruct backend which assets need to be signed; might be still helpful for consumer system)
- It makes content elements like SCORM feasible; the SCORM package usually consists of many statics, exposing which would be a much more tedious and less performant task.
- This approach simplifies export and versioning on the consumer end but results in redundant assets in case of use across multiple repositories.
TIP
This change requires asset migration. For more details, please visit the migration guide.
# Setup
# Local proxy
To use Tailor’s asset proxy, set the following environment variable values in Tailor’s .env file:
- STORAGE_PROXY to local
- STORAGE_PROXY_PRIVATE_KEY to the pkcs1 private key (either 1024, 2048, or 4096 bits). To verify the format, you can check whether the key begins with “-----BEGIN RSA PRIVATE KEY-----”
The private key should be inlined with ASCII escape sequence \n denoting newlines.
It can be generated using the OpenSSL CLI. For example, to generate a 2048-bit private key, the following command can be run:
openssl genrsa -out private-key.pem 2048
The generated key should be modified to match the format:
-----BEGIN RSA PRIVATE KEY-----\ncomponent\ncomponent\ncomponent\n-----END RSA PRIVATE KEY-----
After the successful setup, assets should be served at https://{tailor.domain}/proxy/ (opens new window).
# AWS Cloudfront
To set up the CloudFront instance, you should first create a public/private key pair. You can generate the key pair using OpenSSL by creating the private key as described in the local proxy configuration. Using the new private key, you can generate the public key with the following command:
openssl rsa -in private-key.pem -outform PEM -pubout -out public-key.pem
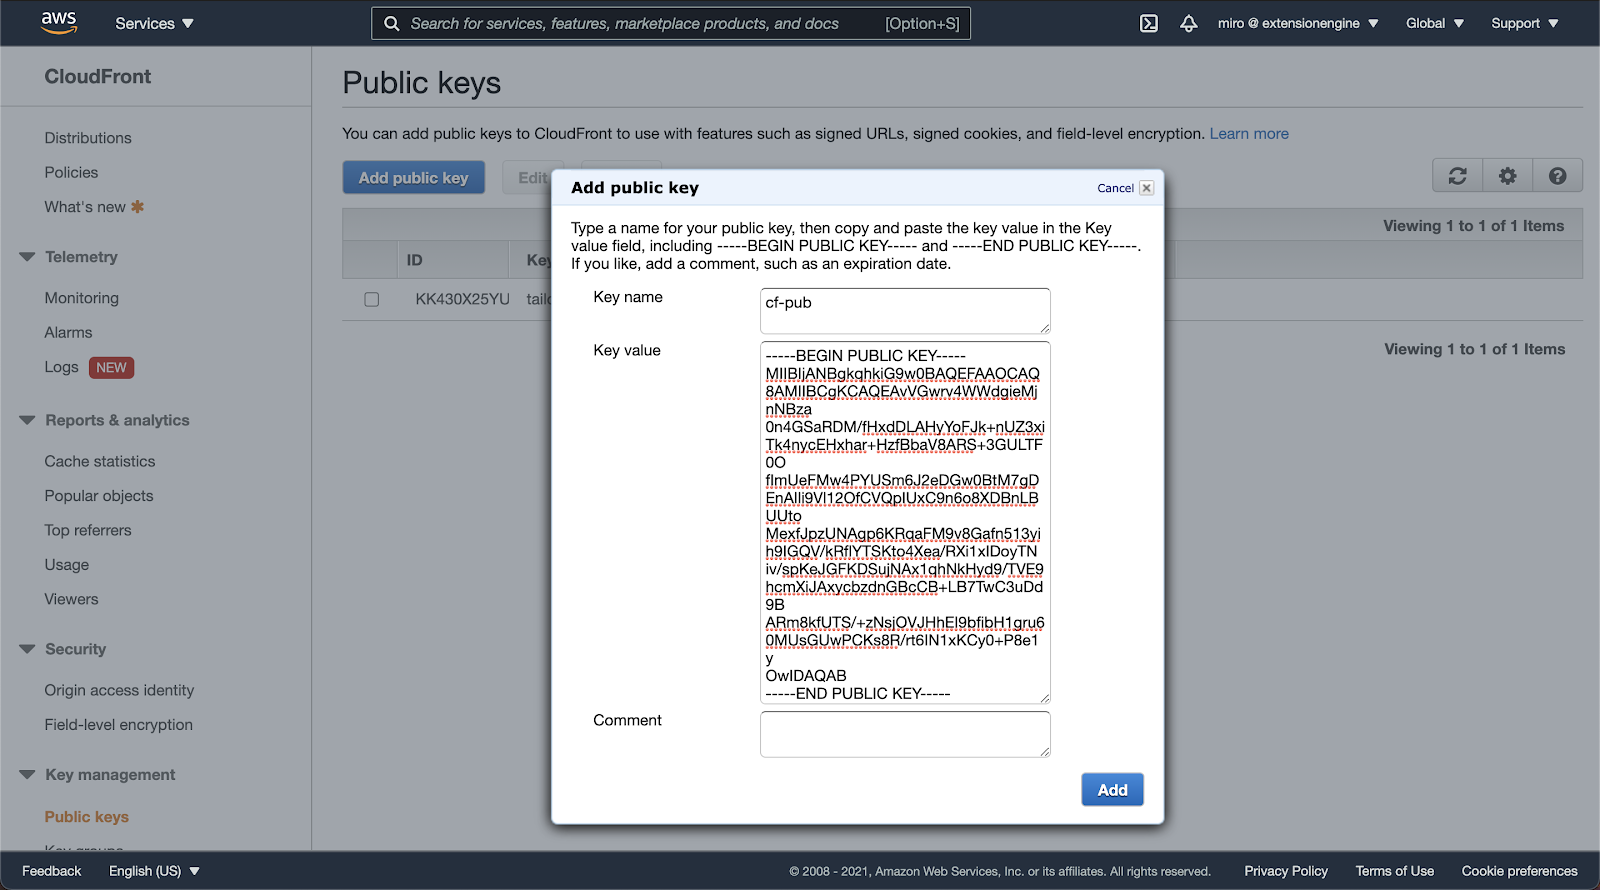
Add the public key to the “Public keys” on the CloudFront service page in the “Key management” section.
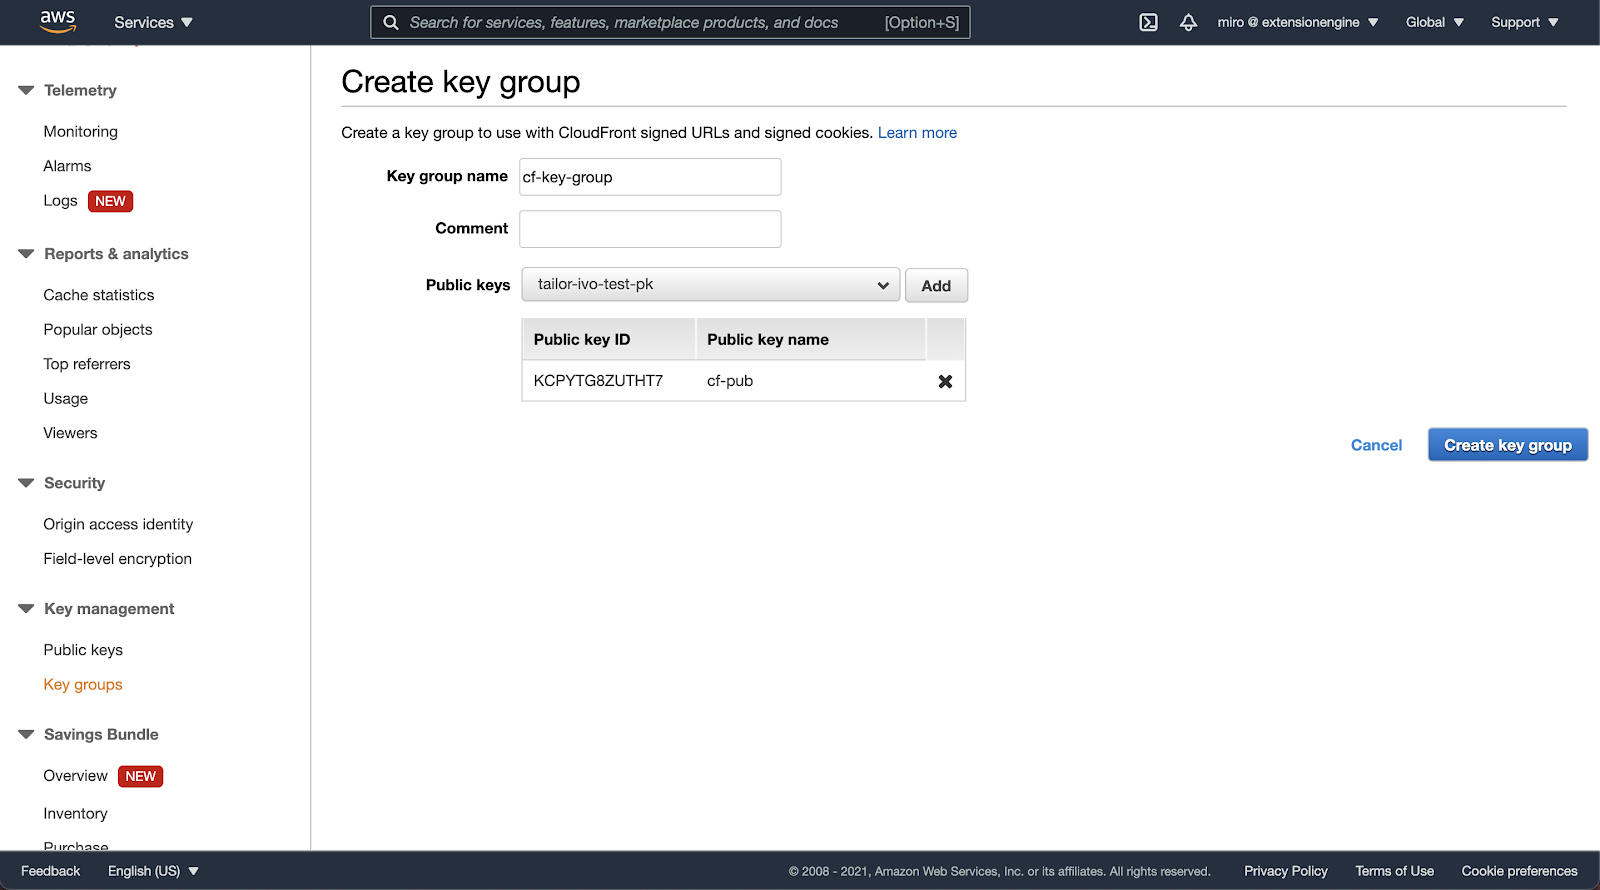
If there are no key groups yet, one should be created in the “Key groups” listing. Add the public key to the key group that’ll be used by the CloudFront distribution.
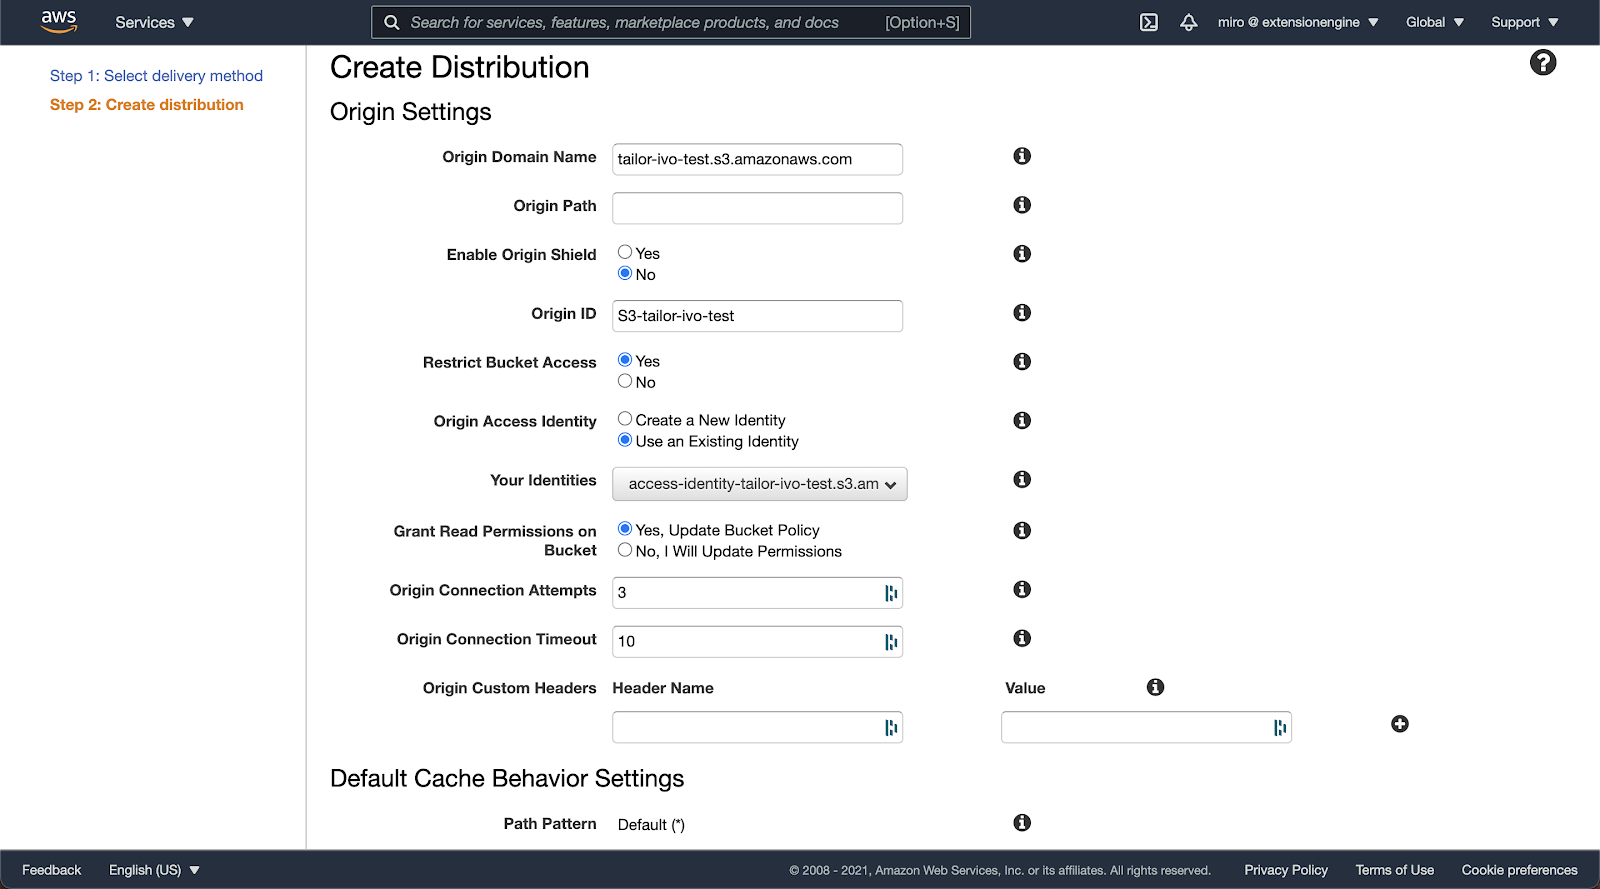
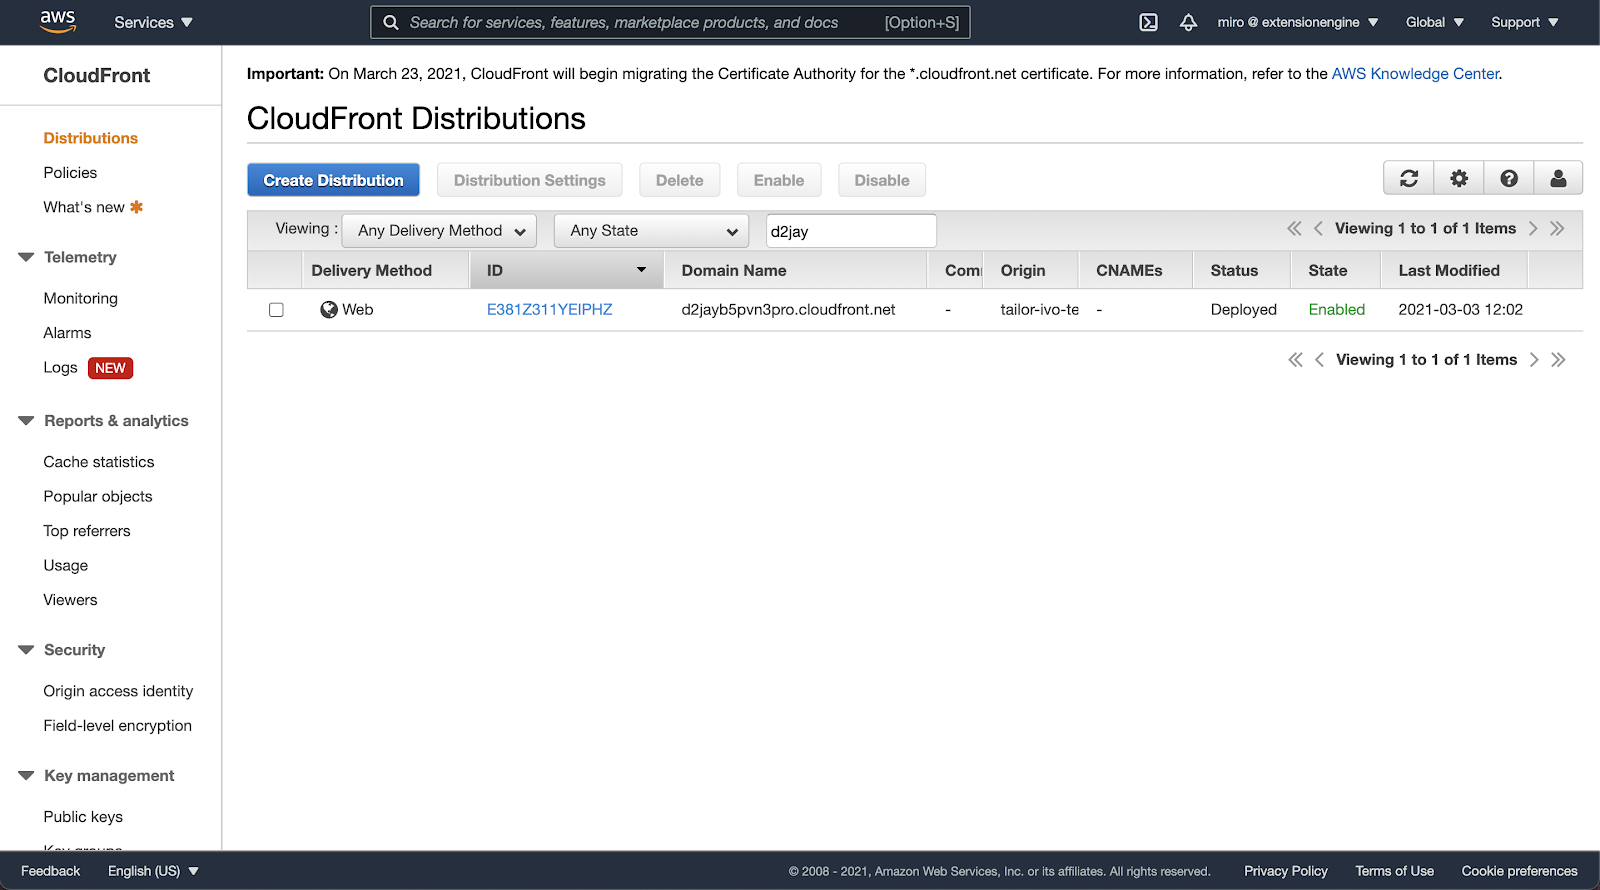
CloudFront distribution can be created from the CloudFront service page. Assuming the S3 service is used as the asset storage, origin settings should be automatically populated after choosing the S3 bucket origin domain name from the list of provided field options. To only allow access to the S3 bucket through CloudFront distribution, set the following settings:
- Restrict Bucket Access to Yes
- Grant Read Permissions on Bucket to Yes, Update bucket policy
- This will automatically generate the S3 access policy to allow the S3:GetObject action only to the CloudFront distribution. CloudFront distribution is given access through Origin Access Identity. If it doesn’t exist yet, you can create it immediately from the form.
If the proxy is set to a different domain than the Tailor instance, Origin Request Policy in the default cache behavior settings should be set to Managed-CORS-CustomOrigin, to forward the origin header to the S3 bucket. To restrict access to the CloudFront resources using signed cookies, Restrict Viewer Access should be set to Yes, and the previously created Trusted Key Group should be picked.
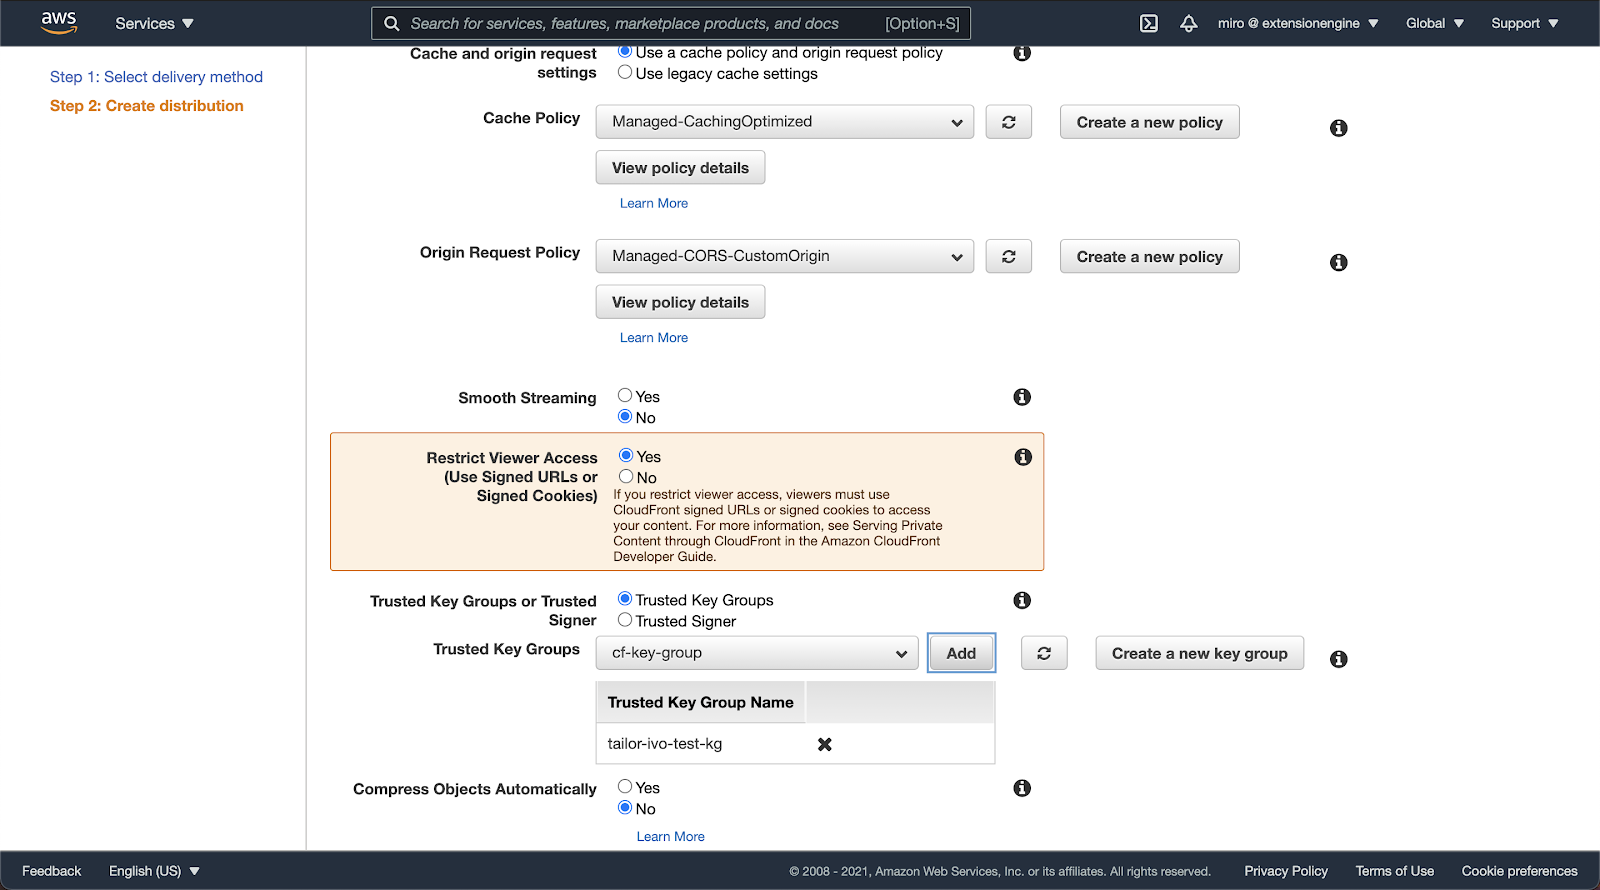
When signed cookies are used for access control, CloudFront distribution’s alternate domain name should be set to the subdomain or the domain of the Tailor instance. This can be achieved with the following steps (opens new window). The rest of the settings can be optionally set if needed, and the CloudFront distribution can be created.
After you’ve successfully created the CloudFront distribution, you should configure Tailor to use it as an asset proxy. This can be achieved by setting the following environment variables in Tailor’s .env:
- STORAGE_PROXY to cloudfront
- STORAGE_PROXY_PRIVATE_KEY to the private key previously created, as described in the local proxy configuration.
- STORAGE_PROXY_HOST to the CloudFront distribution origin; for the example shown in images, it should be https://d2jayb5pvn3pro.cloudfront.net (opens new window)
- STORAGE_PROXY_KEY_PAIR_ID to the public key ID we’ve assigned to the trusted CloudFront distribution’s key group; for the example shown in images, it should be KCPYTG8ZUTHT7